This time: a bird! Cut a hole in it and it’s a candlestick holder, or leave it as is and just let it bring you joy. This project is a little more time consuming than the simple stars of candlestick holders I wrote about before, but you get to make a proper little sculpture. The main technique I used for this is a pinch pot, so the bird is not just a heavy ball of clay but consists mostly of a hollow ball.
For this project you can use air dry clay (so there’s no need to fire it). As the name says, this clay will just airdry and can afterwards even be painted with acrylic paints. You can you it for many things, but it will never be watertight or food safe. For decorations it’s fine.
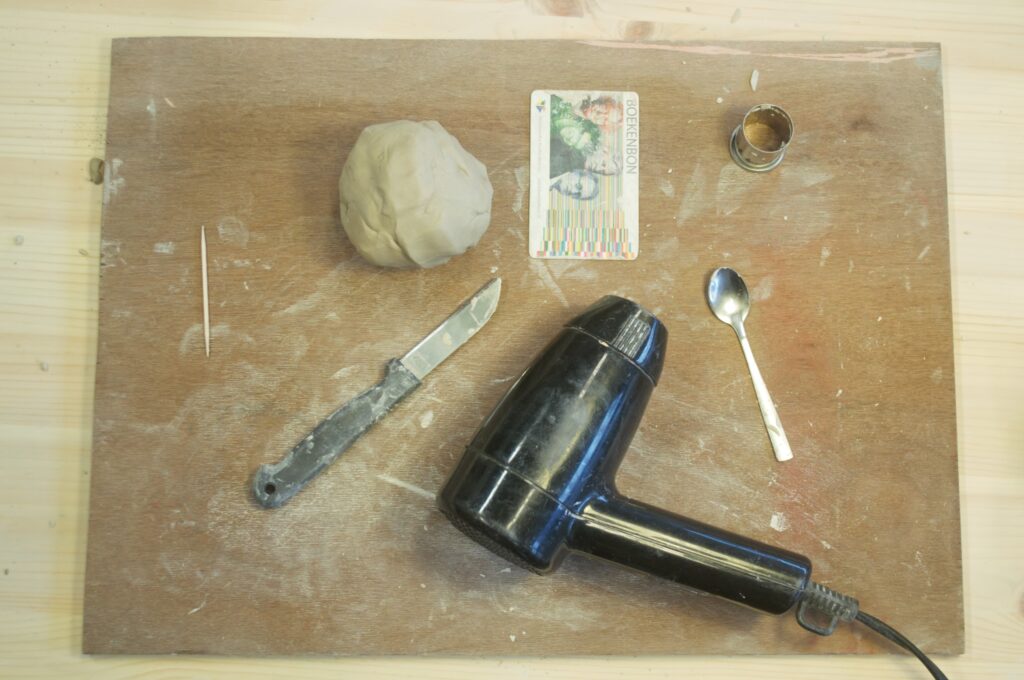
what you need
- ball of (air dry) clay
- (cutting) board
- knife
- old (bank) card
- spoon
- blow dryer
- cocktail pick
- brush/sponge
- (optional: a small hole cutter)
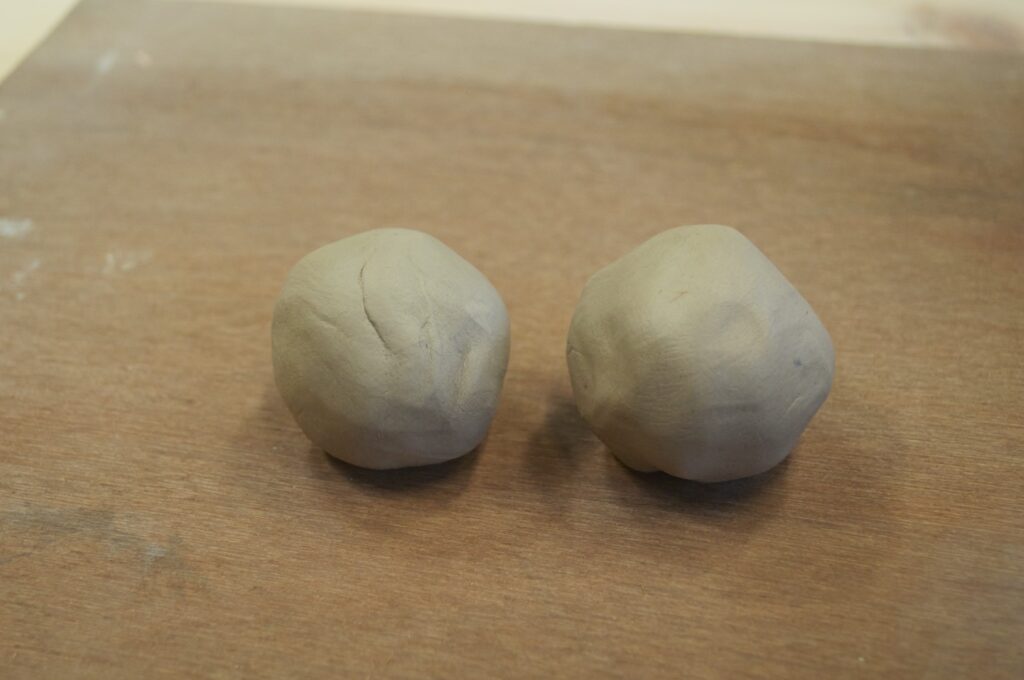
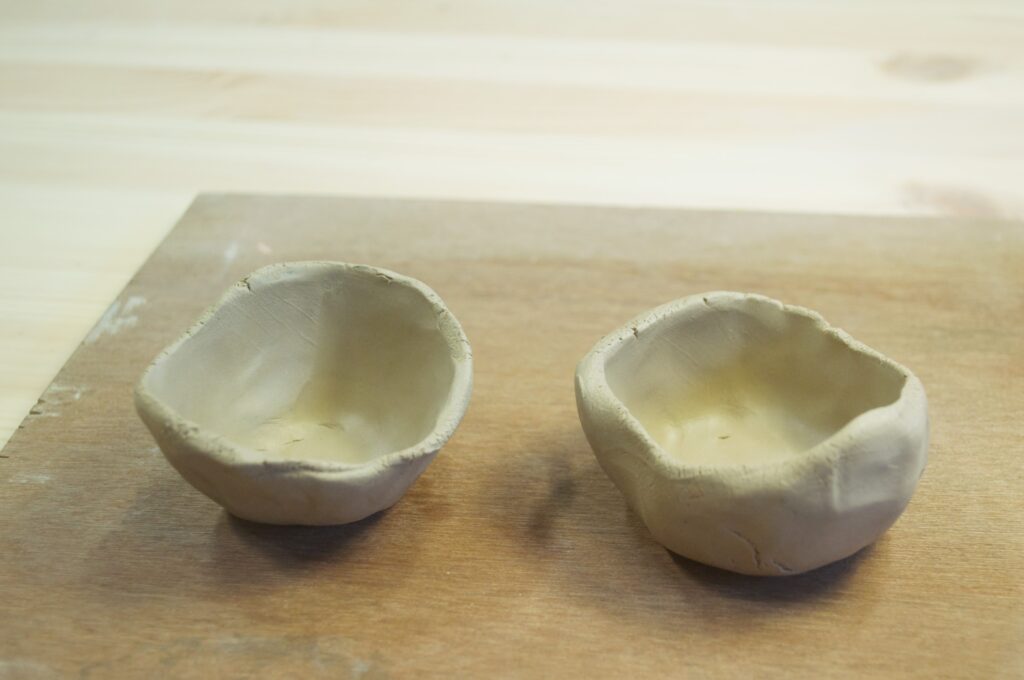
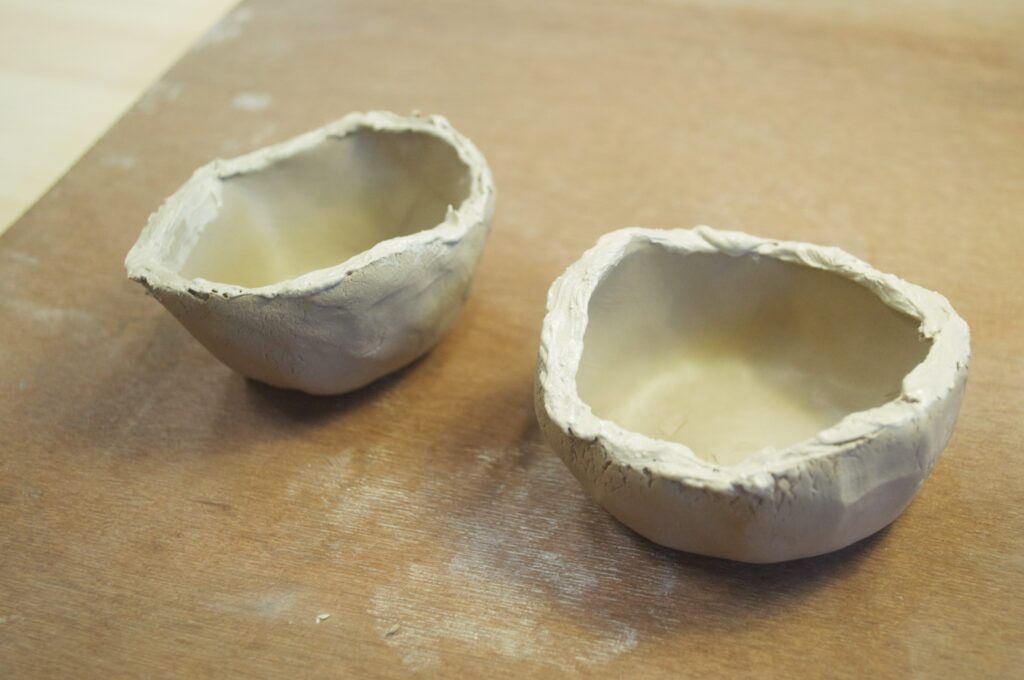
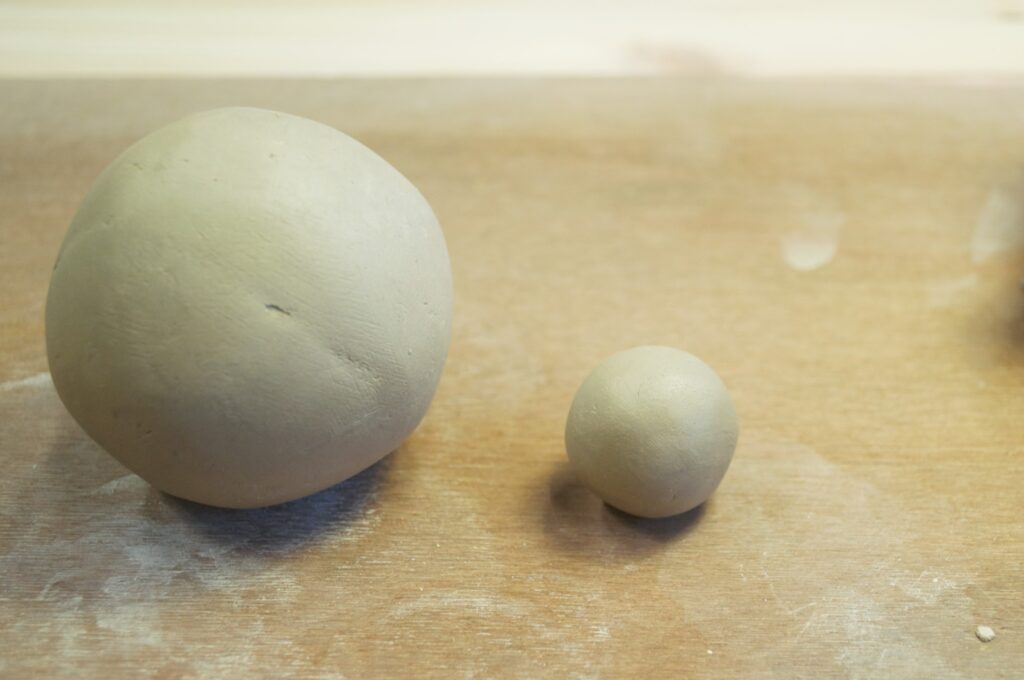
Like I said before, the main technique used for the bird is a pinch pot, or two actually. Get to small balls of clay of about the same size (about 3-4 cm across). Take one of these balls in your left hand and push your right thumb into the center. Now softly press your thumb outwards in a twisting motion, while slowly rotating the ball. By doing this you will slowly open the pot. Make sure you apply even pressure along the entire length of the hole (so don’t claw your thumb), to create an evenly thick wall. If you have something that looks like one half of an orb you’re done. Fold the edge slightly outwards. This does not have to look very tidy, we’ll get to the clean up later. (Check out the pictures below: you’re aiming for the upper right one right now.) Repeat this with the other small ball of clay.
If you need more visual aid you can find some great tutorials one Youtube, just search for pinch pot.
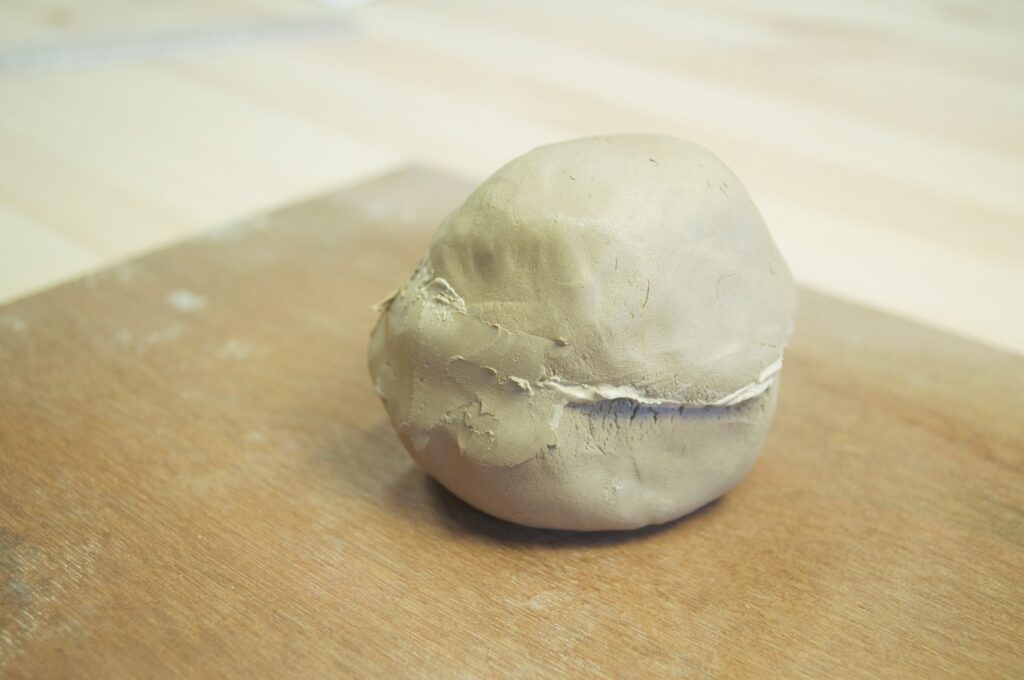
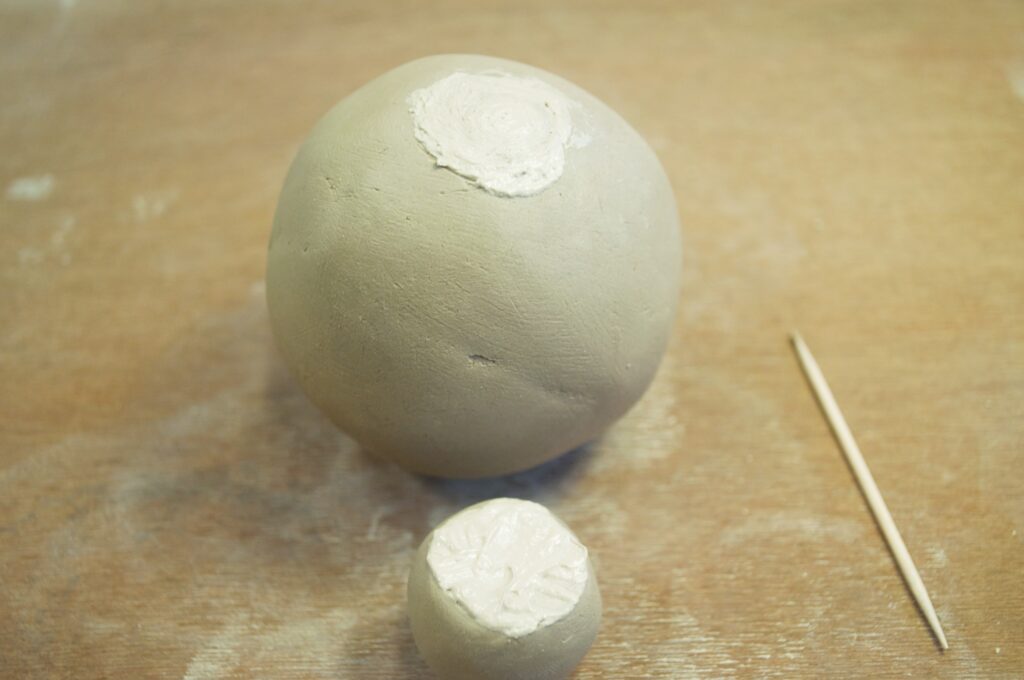
Once you have made your two half orbs you need to stick those together tightly: the aim is to seal the seams completely airtight. Water is your best friend. Wet the rims of both parts thoroughly and press them together firmly. Now use a knife to scrape clay from the edges over the seam until isn’t visible anymore. If you’ve done this right you’re ball will be completely sealed right now. If you’ve made any weird dents or grooves you can apply some extra clay here.
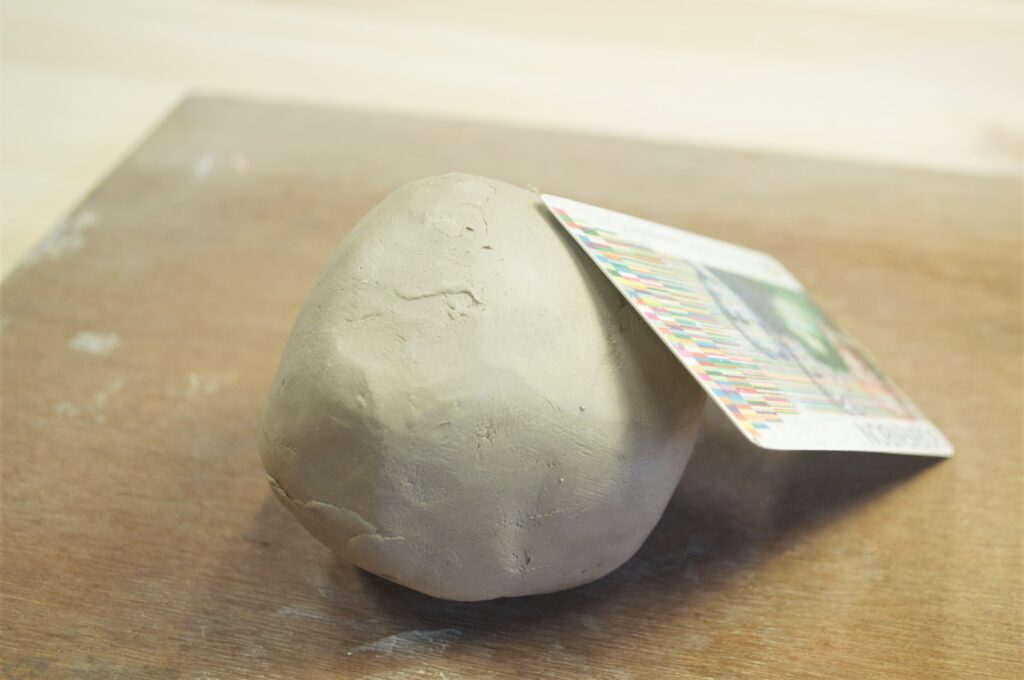
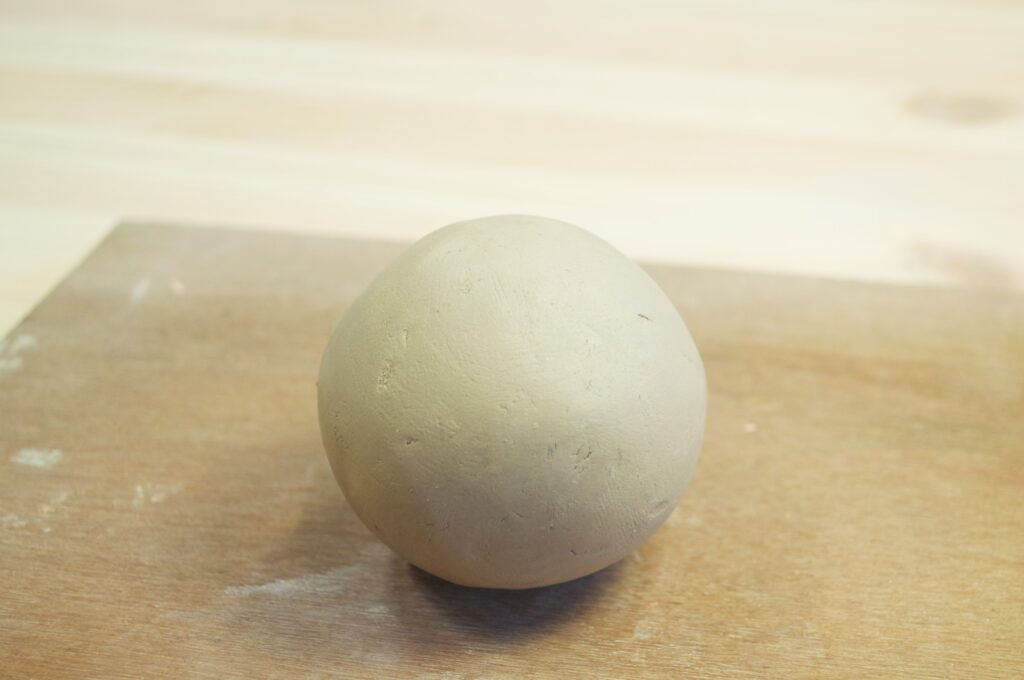
When you’re ball is sealed airtight you can start to smooth it out and shape it. With an old (bank)card you can smoothen out the surface. Pay some extra attention to the former seam. You can shape the ball by rolling it softly on your board. Be careful here: if you apply too much pressure you will get tears and it will lose its shape completely. Switch between rolling and using the card to get the best results. Once you’re satisfied you can firm it up a bit by blow drying the ball. This will make it easier to add new elements to it. Be sure not to dry it too much, because then it will be very hard to stick fresh clay to. The perfect dryness is when the ball will hold its shape, but you can still easily press your nail into it.
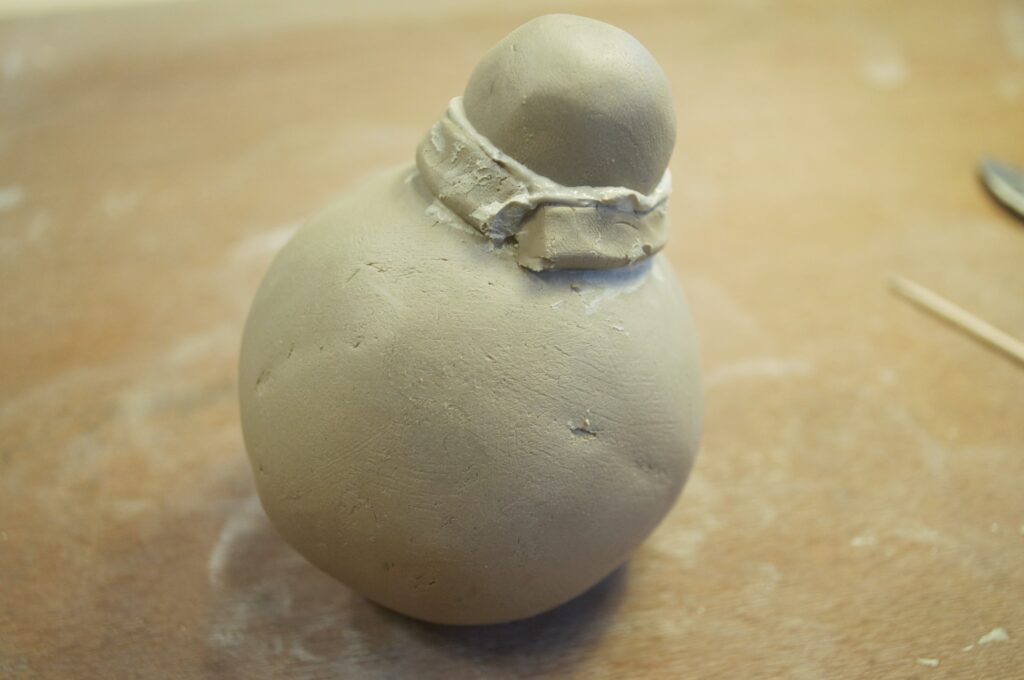
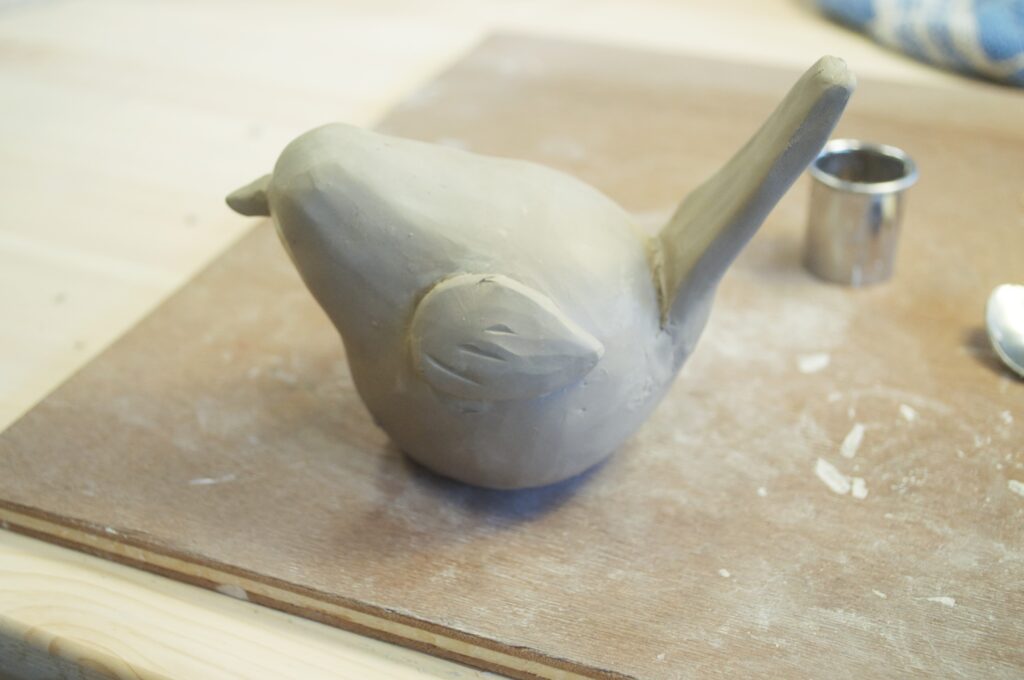
Now it’s time to make a bird of your ball. Take a small piece of clay and roll it between your hands to turn it into a small ball. Cut a slice from the ball (about a fifth) and still it to the big ball with water. Use a knife or a cocktail pick to press the edges firmly to the surface. Now make a roll of clay and stick this (with water) around the small ball like a scarf. Smoothen the edges with your fingers or a bank card to make a seamless transition between the head and body of the bird. If you’re not entirely satisfied yet you can stick more clay to it, or take away, until you get your desired result.
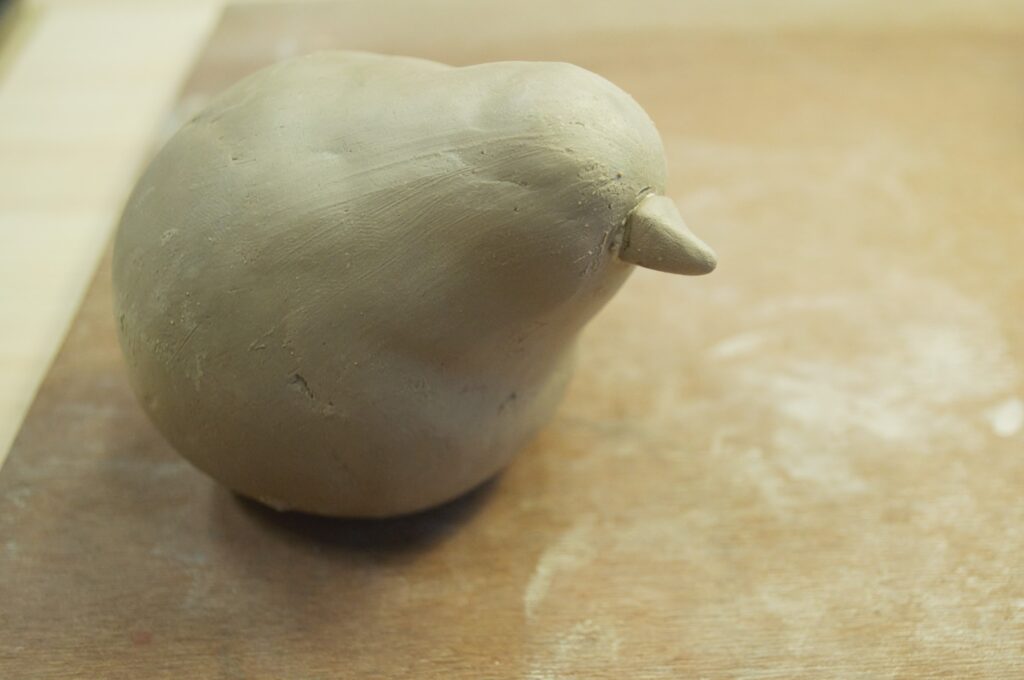
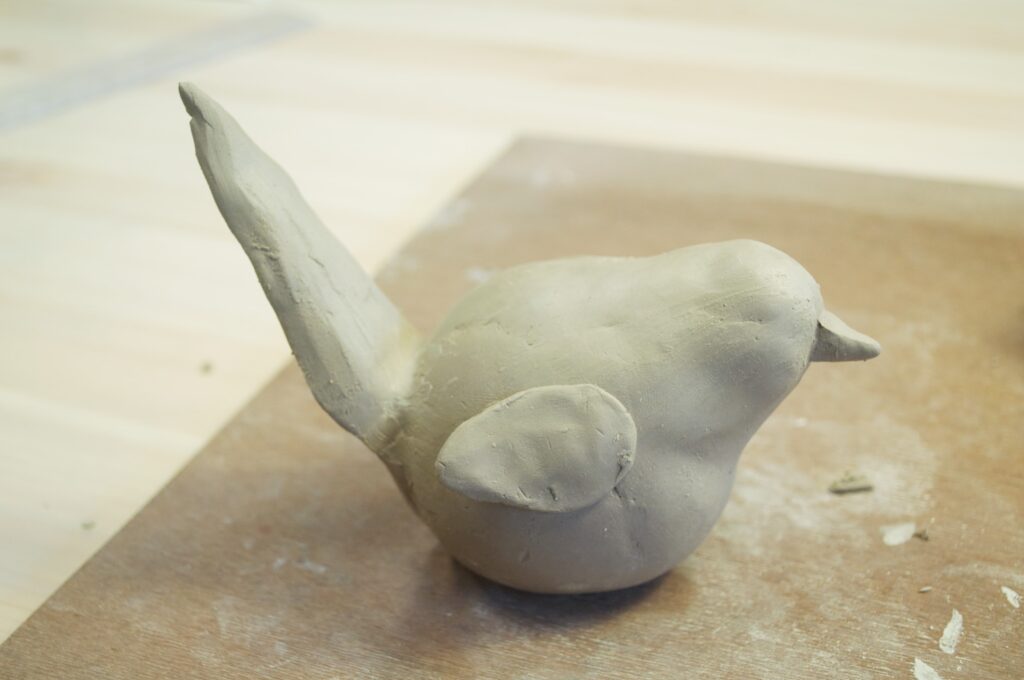
The bird now needs a beak, tail and wings. This is where you can really add some personality. You can make the beak short and broad or long and pointy, the tail can go up or down, etc. By playing with this and experimenting with shapes you can make the bird entirely your own. Stick these elements to the ball with water and firmly press the edges with a cocktail pick. And the great thing about clay is, if you don’t like the result you can just cut it off and start over.

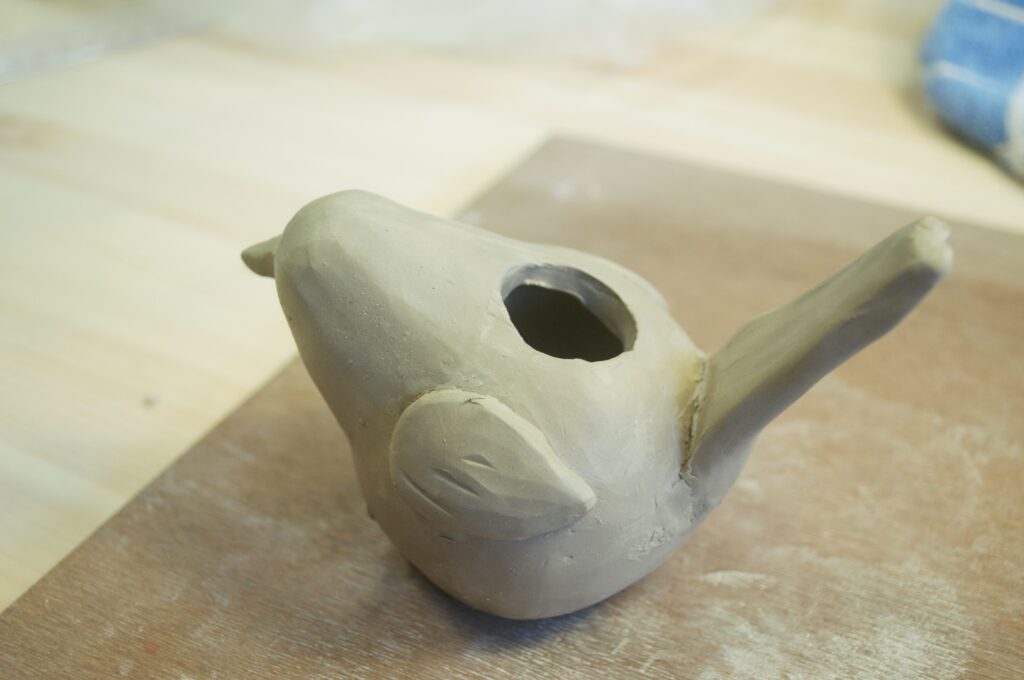
If you’re satisfied with all of your additions you can start with the final touches. With your fingers or the convex side of a spoon you can smoothen out all surfaces. If you want to use the bird as a candlestick holder you can now cut a hole in it. If you don’t want this you can poke a small hole on the bottom. Make sure the ball is firm enough to hold its shape once you cut or poke into it. Blow dry it to make sure. If you cut a bigger hole you can use a brush to smoothen the seams on the inside of the ball. With your fingers you can polish the edges of the cuts.
Now your bird is ready to dry and you’re done!